Create your account
Sign up at app.taxhomebase.com using your email address. TaxHomeBase uses AWS Cognito for secure authentication — you’ll verify your email and set a password.After signing in, you’ll see the Dashboard with an onboarding checklist to guide you through setup.
Set up your tax home
Your tax home is the foundation of your tax-free stipend eligibility. Go to Tax Home and enter:
- Address — Your permanent residence (where you maintain ties)
- Monthly rent — What you pay to maintain the home (even while on assignment)
- Voter registration and driver’s license state — IRS documentation ties
- Last visit date — The IRS expects regular visits (every 30 days recommended)
Add your first assignment
Go to Assignments and tap the + button. Enter your contract details:
- Facility name, location, and state
- Start and end dates
- Base pay (weekly, pre-tax)
- Housing and M&IE stipends (weekly)
- Any bonuses (sign-on, completion, referral)
Log an expense
Go to Expenses and add your first deductible expense. Common categories include: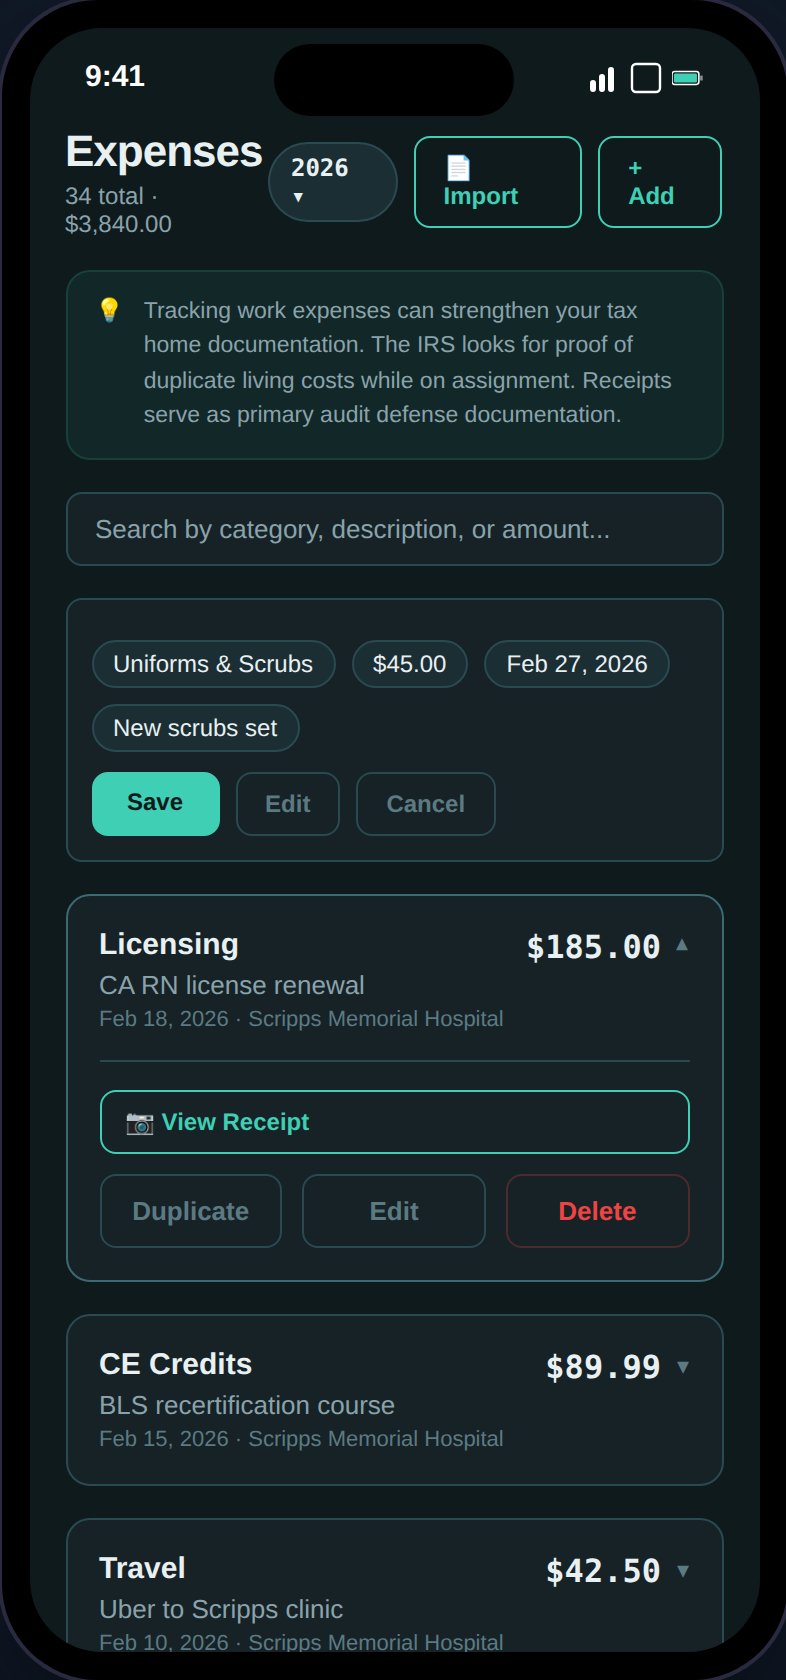
- Travel — Flights, gas, tolls to/from assignments
- Licensing — State license fees, compact license costs
- CE Credits — Continuing education courses
- Supplies — Stethoscopes, scrubs, medical equipment
Check your Dashboard
Return to the Dashboard to see your status: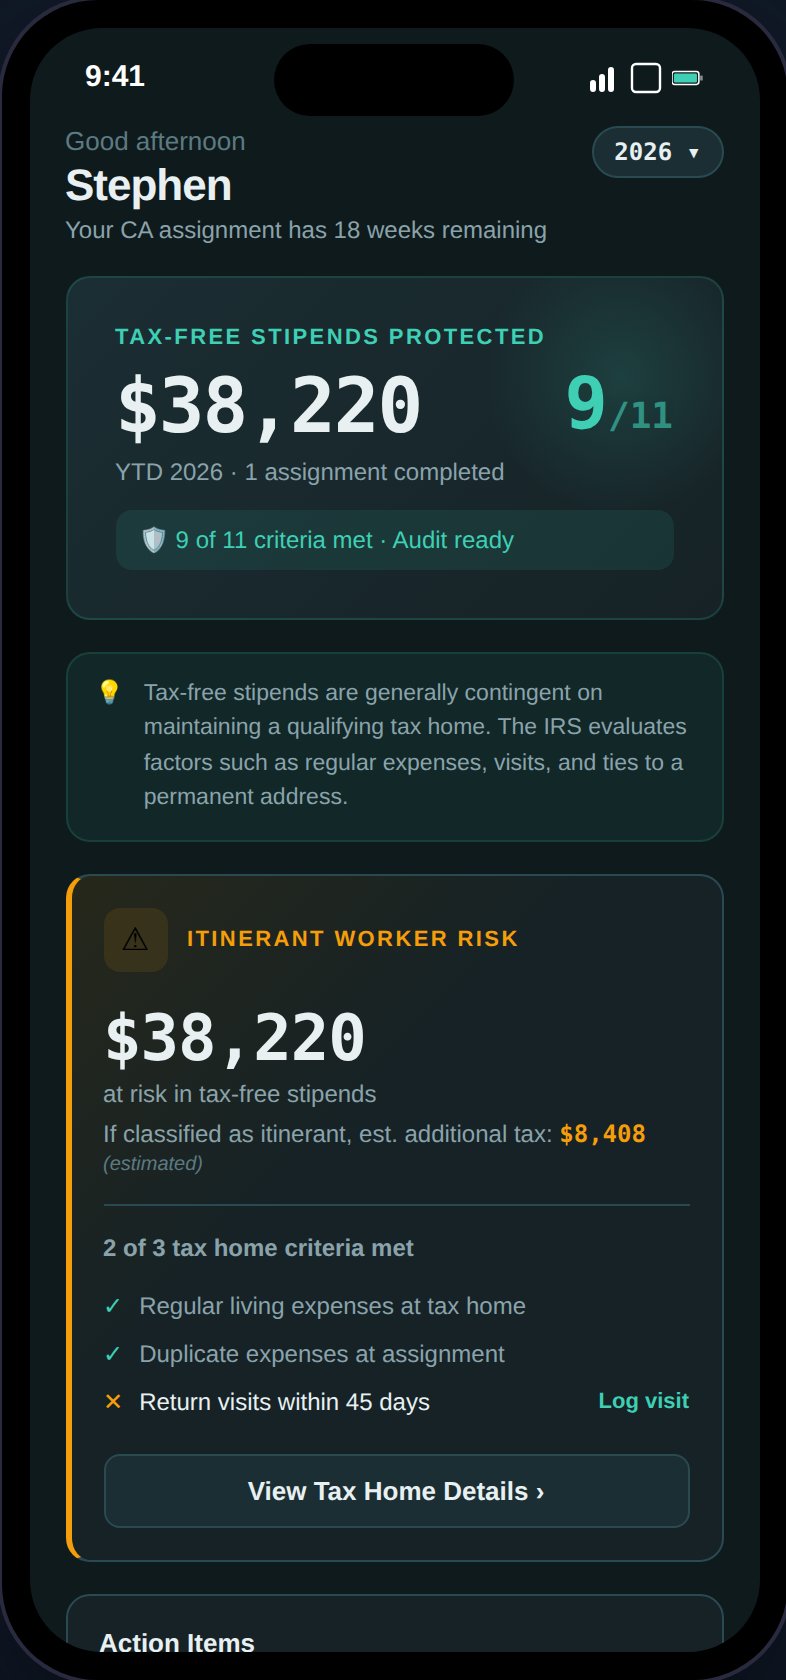

- Stipend Protection Banner — Shows your YTD tax-free stipends and audit readiness score (X/11 criteria met)
- Action Items — Compliance alerts that need your attention (overdue visits, missing docs, GSA exceedances)
- Visit Tracker — Days since your last tax home visit with On Track / Due Soon / Overdue status
- YTD Financial Summary — Taxable income, tax-free stipends, expenses, and estimated take-home
What’s next?
With your tax home, first assignment, and an expense logged, TaxHomeBase is already tracking your audit readiness. Here’s where to go from here:Tax Home Guide
Deep dive into maintaining your tax home and understanding the strength score
Understanding Stipends
Learn the 4 rules for keeping your stipends tax-free
Upgrade to Pro
Unlock tax estimates, state income tracking, contract comparison, and exports
Track Mileage
Log work-related mileage for IRS deductions at the standard rate