

How It Works
1
Open the expense form in create mode
The “Scan Receipt” button is only available when creating a new expense (not when editing).
2
Upload a receipt photo
- Supported formats: JPEG, PNG
- Maximum file size: 10MB
- The image is uploaded to S3 via a presigned URL
3
Textract analyzes the receipt
AWS Textract’s AnalyzeExpense API extracts:
4
Review auto-filled fields
Only empty fields are populated — if you’ve already entered an amount or date, those values are preserved. Review the auto-filled data and adjust as needed.
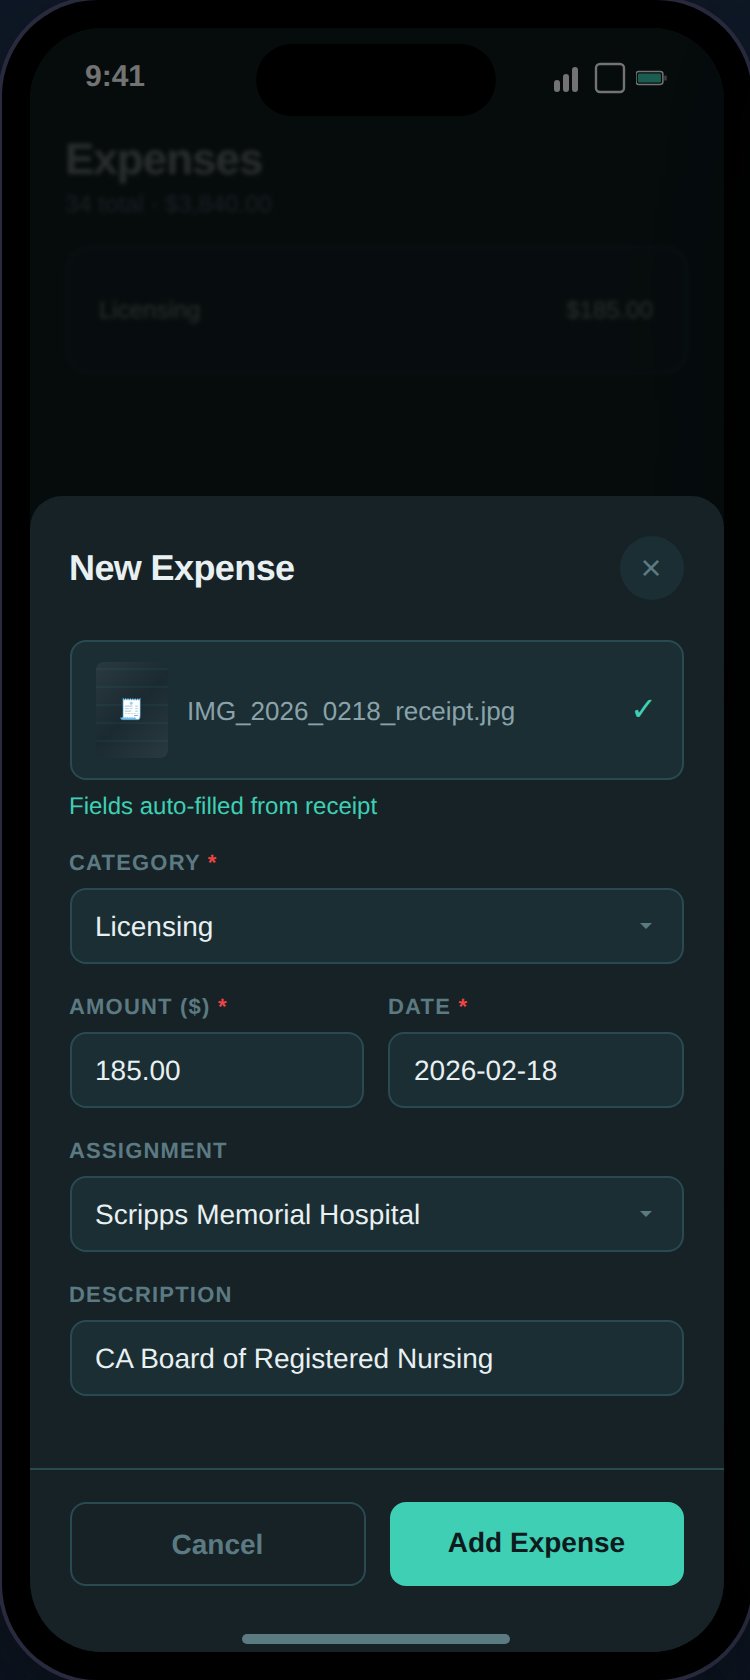
After scanning, Textract auto-fills the amount, date, vendor, and suggests a category.
Category Suggestions
Textract doesn’t directly categorize expenses. TaxHomeBase uses keyword matching on the vendor name to suggest a category:
If no keywords match, the category field is left empty for you to select manually.
Viewing Receipts
After saving an expense with a receipt:- A camera icon appears on the expense card
- Click it to open the receipt in an in-app modal
- The modal loads the image via a presigned S3 download URL
- Both the Expenses and Expense Reports pages use the same receipt viewer
Receipt Substantiation
The IRS requires receipts for:- All expenses over $75
- All lodging expenses (regardless of amount)
Error Handling
The scan process has step-specific error handling:- Presign failure — Problem generating the upload URL
- Upload failure — Problem uploading to S3
- Textract failure — Problem analyzing the receipt